Recording Your First Video
Capture a local screen, window, webcam, audio, and editor context in a Fraime.it project.
Before you record
Fraime.it requires macOS 15 Sequoia or later. The first time you record, macOS may ask for Screen Recording, Microphone, Camera, and Accessibility permissions depending on the options you enable.
Before a real take, close private tabs, notification-heavy apps, password managers, and anything that might reveal customer data. Fraime.it can redact after the fact, but a cleaner source recording is always easier to ship.
Quick checklist
- Pick the app, window, display, or area you want viewers to focus on.
- Decide whether the video needs webcam, microphone, system audio, or both audio sources.
- Connect the editor extension before recording a coding session.
- Do a short test recording if this is your first time using a source, microphone, or camera.
- Make sure macOS permissions are granted before the important take.
Choose a source
Open Fraime.it and pick the display, window, or area you want to capture. Use a window source when you want a focused app demo. Use a display or area source when the walkthrough moves across multiple apps.
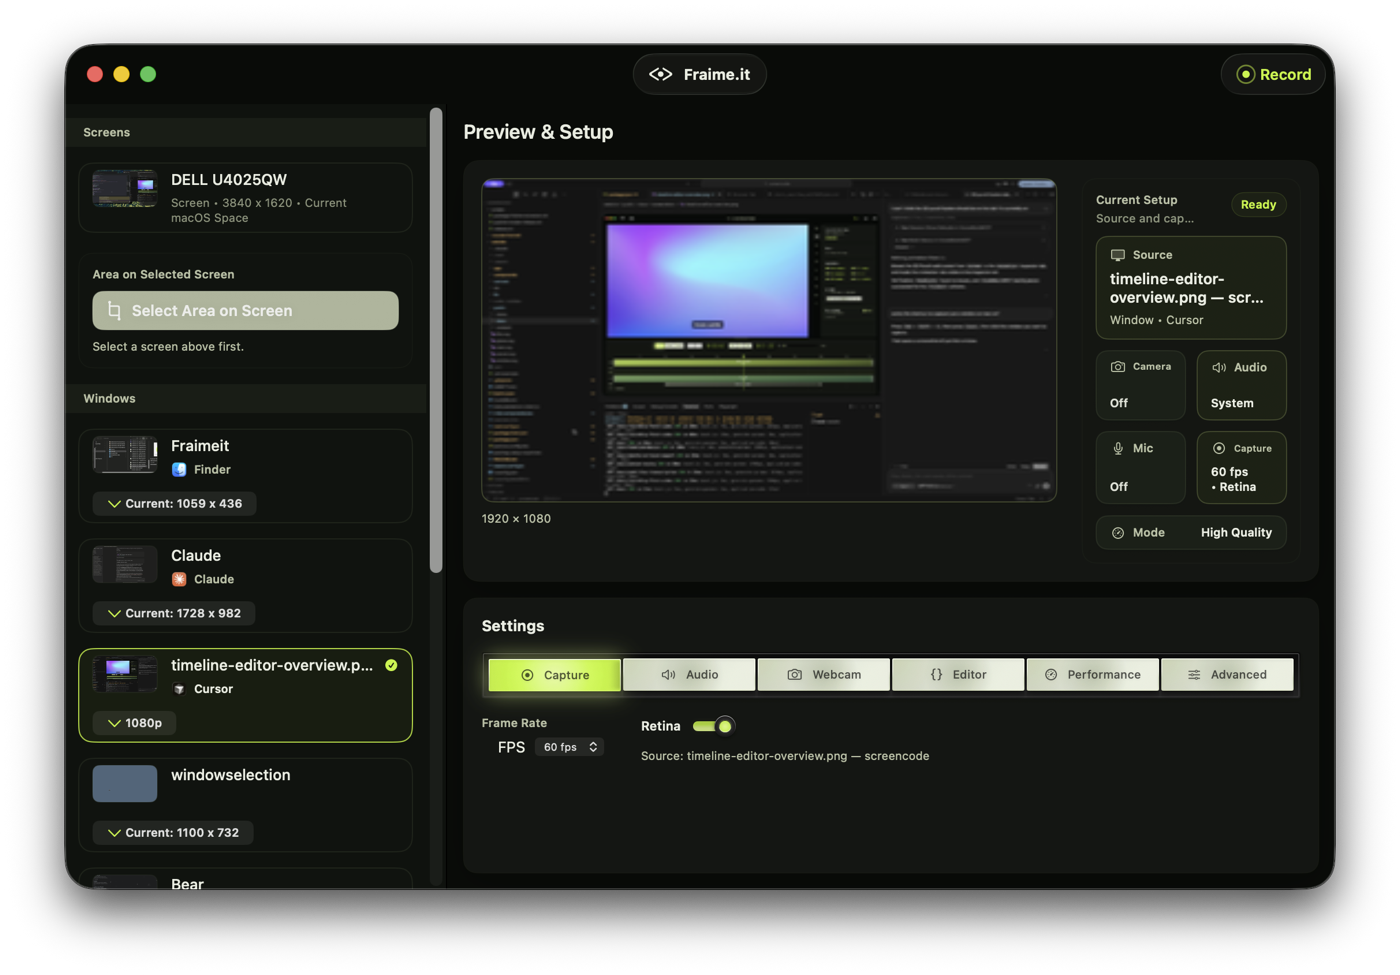
Choose a display, window, or area, then confirm camera, audio, microphone, quality, and frame rate before recording.
Use area capture when the important content is smaller than the full display. This can make later framing, zoom, and Shorts exports cleaner because there is less irrelevant space around the subject.
Configure capture
Choose the frame rate, retina capture setting, audio mode, and webcam option before starting. Fraime.it can capture system audio, microphone audio, both, or neither.
If you are recording a coding session, install and enable the VS Code-family extension so the project includes editor metadata such as file path, language, cursor position, visible range, and function scope.
For a full explanation of the Capture, Audio, Webcam, Editor, Performance, and Advanced settings tabs, see Recording Settings Reference.
Choose audio deliberately
Use microphone audio for narration. Add system audio only when the app sound matters to the viewer. If you are recording a quiet coding walkthrough, microphone-only is often easier to mix and clean up later.
Use webcam only when it helps
Webcam can make tutorials feel more personal, but it also takes space in the frame. If the final video is a vertical Short, consider recording webcam and then using the Shorts template plus background removal to create a compact picture-in-picture layout.
You do not need to perfect webcam background treatment during capture. Fraime.it records the camera track so you can later adjust picture-in-picture layout, background blur, person segmentation, or green-screen keying in the editor.
Start and stop
Start recording from the app. When you stop, Fraime.it saves a .fraimeit package under your Movies folder. That package contains the screen recording, optional webcam recording, sidecar metadata, and timeline data used by the editor.
Review the recording
After recording, open the project and check:
- The screen source is the one you intended.
- Audio is present and not clipping.
- Webcam appears when expected.
- Cursor and keyboard presentation are usable.
- IDE context appears if you recorded with the extension.
Next step
Open the saved project in the editor, review the timeline, then trim, annotate, redact, subtitle, or export the recording.
Troubleshooting
If the screen is black or missing, check macOS Screen Recording permission and restart the app after granting it. If microphone or camera is missing, check the corresponding macOS privacy permission. If editor context is missing, make sure the extension is installed, enabled, and connected before starting the recording.